1. Your personal website¶
What you'll have at the end: a page at https://your-username.github.io with your
name, what you work on, your education, your projects, and links to your GitHub and
LinkedIn. A real URL you can put on a CV.
How long: about two hours, taking your time. Your page will be live on the internet after the first twenty minutes — everything after that is making it better.
What you need to know already: nothing. If you've written a Python script before, some of this will feel familiar, but it isn't assumed.
1. The goal¶
What you're building is a plain, fast, readable page: your name, a line about what you work on, and links to the rest of you. No framework, no template, no cookie banner. One HTML file and one CSS file that you wrote and understand completely.
That last part matters more than it sounds. A page you built by hand is a page you can change at 11pm the night before an application deadline.
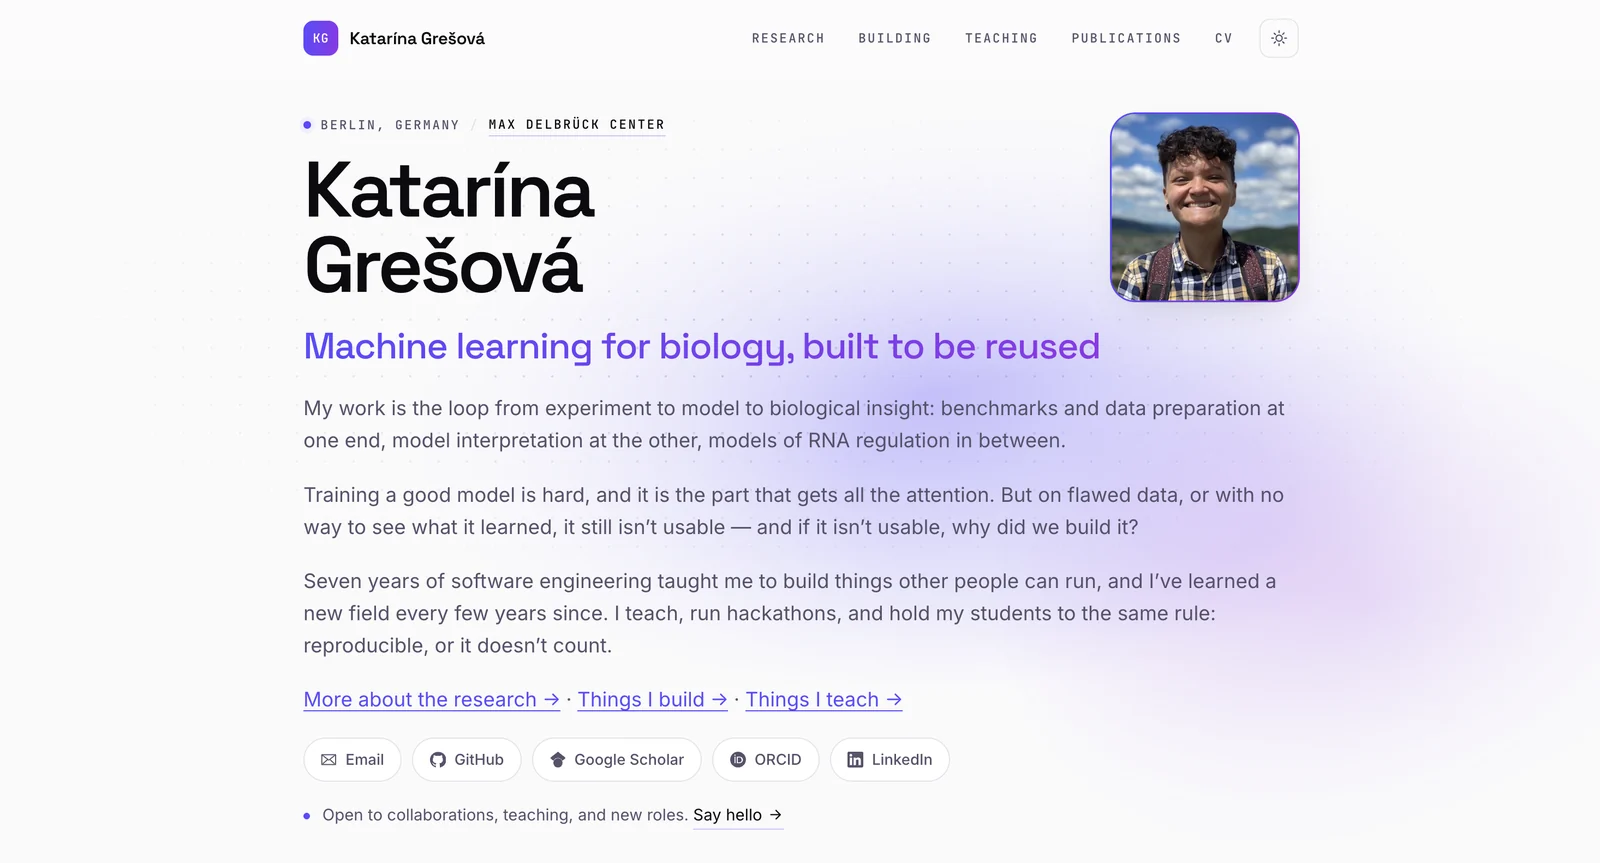
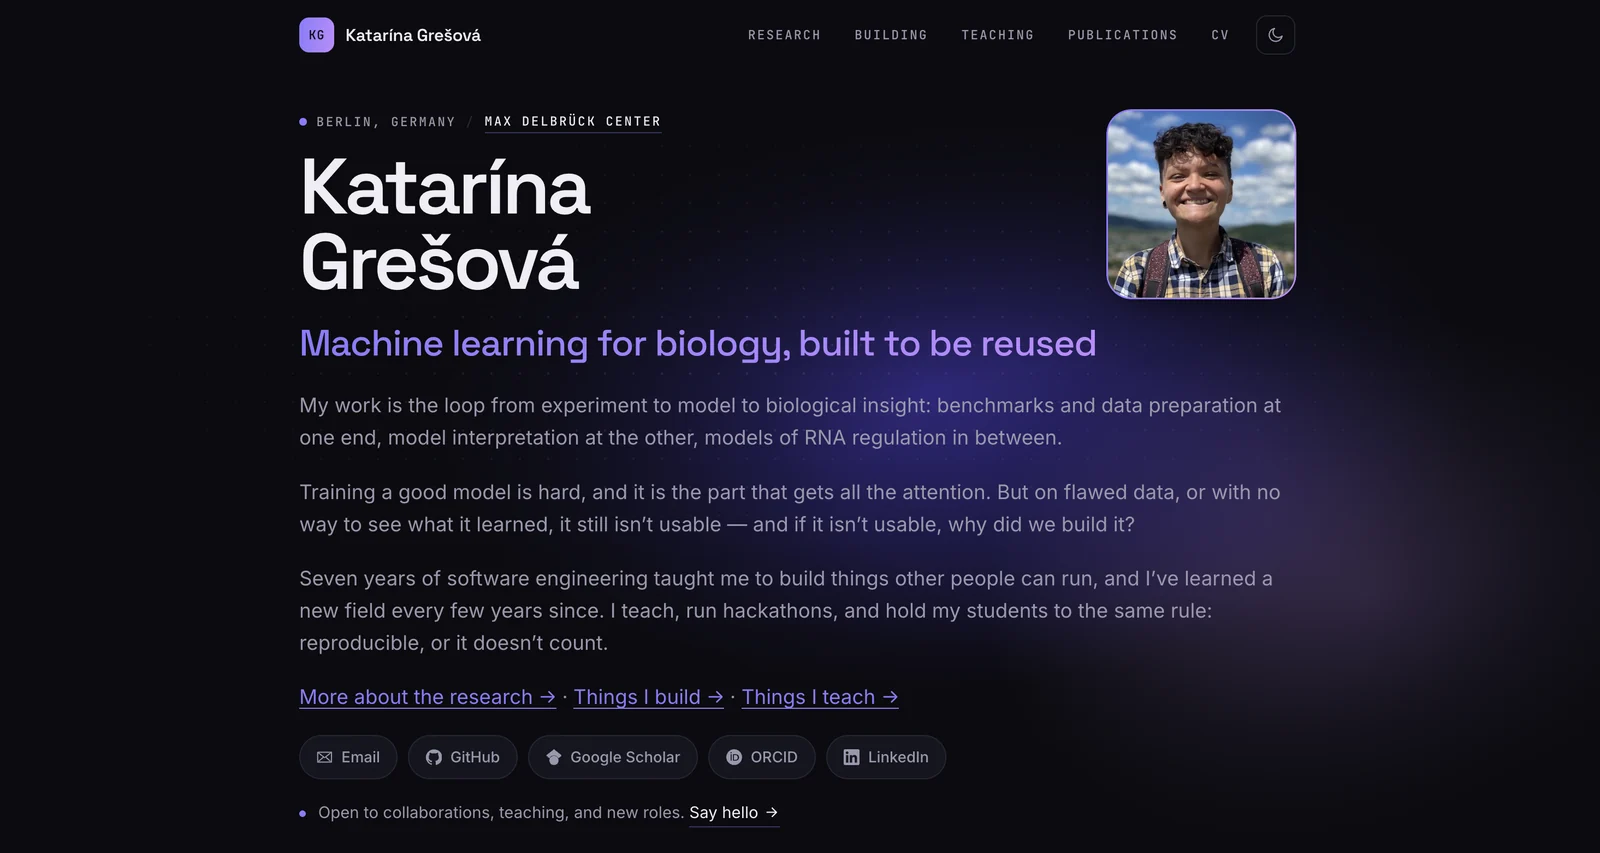
My own page at katarinagresova.com — the same GitHub Pages
setup you'll have running in twenty minutes, with a lot of small changes layered on since.
It started life at katarinagresova.github.io, exactly where yours will start; the custom
domain came years later and is an afternoon's work whenever you want it (§8).
Yours will start plainer than this, and that's the point: plain and live beats elaborate
and unpublished.
About the hand-written HTML
This site you're reading is not hand-written HTML — it's generated by a tool called MkDocs. So why teach you the hard way?
Because generators hide the raw thing, and the raw thing is what you need to understand. Once you've written HTML by hand, a generator is a convenience. If you start with the generator, it's magic — and when it breaks, you're stuck. Switching to one later is easy; starting there and working backwards is not.
2. Accounts and tools¶
Three things. Do all three now; it's the boring part and it's over quickly.
A GitHub account¶
Sign up at github.com if you don't have one.
Your username matters here — it becomes part of your website address, and it's the
name other people see on your code. Pick something you'd be happy putting on a CV. Some
version of your actual name is the safe choice. bunnyrabbit95 is a choice you will
regret at a job interview.
If you already have an account with a username you hate, you can change it in Settings → Account. Do that now rather than later; it gets more disruptive the more you've built.
Git¶
Git is the program that tracks changes to your files and sends them to GitHub.
Open Terminal ( Spotlight → type "Terminal") and run:
If you get a version number, you're done. If macOS offers to install "command line developer tools", say yes and wait.
Install Git for Windows. Accept all the default options in the installer.
This gives you a program called Git Bash. Use Git Bash for every command in this tutorial — not PowerShell and not Command Prompt. Git Bash gives you the same commands as macOS and Linux, which means the rest of this tutorial applies to you unchanged.
Then tell git who you are. It stamps this onto every change you make:
Use the same email address as your GitHub account, so GitHub knows the changes are yours.
A text editor¶
VS Code is the standard choice and it's free. Install it.
Do not write HTML in Microsoft Word. Word will silently turn your quote characters into curly quotes and your page will break in a way that's genuinely hard to diagnose.
3. Get something live¶
Now the part that matters. We're going to put a page on the internet before we learn anything at all about how it works.
Create the magic repository¶
A repository (or "repo") is a folder that git tracks. On GitHub, it's a project.
GitHub has one special rule: if you create a repository named exactly
your-username.github.io, GitHub publishes its contents as a website at that address.
- Go to github.com/new.
- In Repository name, type
your-username.github.io— with your username substituted in, exactly as it's spelled on your account. If your username isagnesbio, the repository isagnesbio.github.io. - Set it to Public. Private repositories don't get published on the free plan.
- Tick Add a README file.
- Click Create repository.
The name has to be exact
agnesbio.github.io works. AgnesBio.github.io works too (GitHub is relaxed about
capitals here). agnesbio.github.com does not. agnes.github.io does not, unless
your username is agnes.
If the address doesn't work later, this is the first thing to check.
Add a page¶
We'll do this in the browser for now — no terminal yet.
- In your new repository, click Add file → Create new file.
- Name the file
index.html. The name matters:index.htmlis what a web server shows when someone visits the address with nothing after the slash. - Paste this in:
<!DOCTYPE html>
<html lang="en">
<head>
  <meta charset="utf-8">
  <title>Your Name</title>
</head>
<body>
  <h1>Hello, I am on the internet</h1>
</body>
</html>
- Scroll down and click Commit changes, then Commit changes again in the dialog.
Turn on Pages¶
- In the repository, click Settings (top bar, on the right).
- In the left sidebar, click Pages.
- Under Source, choose Deploy from a branch.
- Branch:
main, folder:/ (root). Click Save.
Wait, then look¶
Go to https://your-username.github.io in a new tab.
The first time, it takes one to three minutes. You may get a 404 in the meantime — that's normal, it means GitHub hasn't finished publishing yet. Refresh every thirty seconds.
You can watch the progress in the Actions tab of your repository: an orange dot means it's building, a green tick means it's done.
Stop here for a second
That's a real website, at a real address, served to anyone in the world who types it in. You can send that link to someone right now and they'll see it.
Everything from here on is improving a thing that already exists, which is a much better position to be in than building toward something that doesn't.
4. The git loop¶
You've now made one change through the GitHub website. That works, but it's slow and you can't preview anything before it goes public. So we move to working on your own computer — and for that you need git.
Here's the whole mental model:
Git keeps a list of saved versions of your project. You choose what goes into each saved version, you write a note about what changed, and then you send your saved versions up to GitHub.
Four commands do almost all of it:
| Command | What it does | Plain English |
|---|---|---|
git status |
Shows what's changed | "Where am I, what have I done?" |
git add <file> |
Marks a file to be included | "Include this in the next save" |
git commit -m "message" |
Saves a version | "Save it, with this note" |
git push |
Sends saves to GitHub | "Send it up" |
That's it for now. Git has branches, a staging area with its own theory, rebasing, and a reputation for being confusing. You don't need any of it today. One person working on one website needs those four commands.
git status is the one to lean on. Run it constantly — before and after everything. It's
the only command here that can't break anything, and it usually tells you what to do next.
5. Working on your own computer¶
Connecting your computer to GitHub¶
Your computer needs to prove it's allowed to push to your repositories. You do that with an SSH key.
The idea is simpler than the name makes it sound. You generate a pair of files. One is private and never leaves your computer. The other is public, and you paste it into GitHub. From then on GitHub recognises this computer and lets it push — no password, ever again.
This is worth doing properly, because it isn't really a GitHub thing. It's the same kind of key, made by the same command, that gets you into a compute cluster or a remote server later.
1. Generate the key
Use the same email address as your GitHub account. It asks you three questions:
- Enter file in which to save the key → press Enter to accept the default,
~/.ssh/id_ed25519. - Enter passphrase → press Enter for none, or type one. A passphrase protects the key if your laptop is stolen, at the cost of typing it every time you push. On a computer only you use, empty is a reasonable choice.
- Enter same passphrase again → the same again.
You now have two files in ~/.ssh/:
| File | What it is |
|---|---|
id_ed25519 |
Private. Stays on this computer. Never send it anywhere. |
id_ed25519.pub |
Public. This is the one you give to GitHub. |
Only the .pub file leaves your computer
The two names differ by four characters, and that difference is the entire security model. Anyone holding the private key can act as you on GitHub. If you ever paste it somewhere by accident, generate a new pair and delete the old key from GitHub — it takes a minute, and it's much better than the alternative.
2. Copy the public key
You get one long line starting with ssh-ed25519 and ending with your email address.
Select the whole thing and copy it — from ssh- to the last character, with no line breaks
in the middle.
3. Give it to GitHub
- Go to github.com/settings/keys.
- Click New SSH key.
- Title: something that tells you which machine it is —
laptop,work desktop. You'll accumulate a few of these over the years, and "key 1" will mean nothing to you. - Key type: Authentication key.
- Paste into the Key box and click Add SSH key.
4. Test that it works
Don't skip this. It's one command, and a problem is far easier to understand now than in the middle of your first push:
The first time, it tells you it has never seen github.com before:
The authenticity of host 'github.com (140.82.121.4)' can't be established.
ED25519 key fingerprint is SHA256:+DiY3wvvV6TuJJhbpZisF/zLDA0zPMSvHdkr4UvCOqU.
Are you sure you want to continue connecting (yes/no/[fingerprint])?
Type yes and press Enter. That fingerprint is GitHub's own, and GitHub
publishes it
— it should match the line above character for character. Then you should see:
That is success, despite the "but". It's telling you two things: your key works, and github.com isn't a machine you can log into and use as a terminal. Your own username in that greeting is what you're checking for.
Your GitHub password won't work
If git ever asks for a username and password in the terminal, your account password is not the answer — GitHub stopped accepting it in 2021. It means git is talking to GitHub over HTTPS instead of using your key. See when things go wrong.
If you'd rather use the GitHub CLI
The GitHub CLI can set all this up for you: install gh,
run gh auth login, and choose "Login with a web browser". On your own laptop that is
a perfectly good choice.
The reason this tutorial teaches keys instead is that gh is another program to
install, and it usually isn't available — and can't be installed — on the shared
compute clusters where you're most likely to want this. ssh-keygen is already on
every machine that has git.
Where am I?¶
Before you download anything, a word about the single biggest source of beginner confusion: the terminal is always sitting in some folder, and commands act on that folder. If a command doesn't do what you expect, the reason is very often that you're somewhere else than you think.
Three commands:
pwd     # "print working directory" — which folder am I in?
ls      # "list" — what's in it?
cd      # "change directory" — go somewhere else
Try them:
Some useful moves for cd:
cd ..              # up one level, to the containing folder
cd ~               # to your home folder
cd                 # also to your home folder
cd -               # back to where you just were
Press Tab
Type the first few letters of a folder name and press Tab. The shell completes it. This is not a nicety — it prevents typos, and typos in paths are the cause of a large share of "but it worked yesterday" problems.
Get a copy of your repository¶
Navigate to wherever you want to keep it. Somewhere you'll find again — not Downloads:
Then clone it — make a local copy that stays connected to GitHub:
You should see index.html and README.md. This folder is now a git repository: git is
watching it, and it knows where on GitHub it came from.
Copy the SSH address, not the HTTPS one
If you get that address from the green Code button on GitHub rather than typing it out, notice that the button opens on the HTTPS tab. Click SSH first. The two look alike, and only the SSH one uses the key you just set up:
git@github.com:agnesbio/agnesbio.github.io.git        ← SSH, what you want
https://github.com/agnesbio/agnesbio.github.io.git    ← HTTPS, will ask for a password
The : after github.com is not a typo. SSH addresses use a colon there, not a slash.
Edit, preview, push¶
Open the folder in VS Code (File → Open Folder, or run code . from the terminal, the
. meaning "this folder").
Change the heading in index.html to something else, and save the file. VS Code does
not auto-save by default; a white dot on the tab means unsaved.
Now preview it. You could double-click the file, but get into the habit of running a small local web server instead — it behaves the way the real site does:
Open http://localhost:8000 in your browser. That's your page, served from your own
computer. Nobody else can see it.
Leave that running — it's a program that keeps going until you stop it. Open a second terminal window for git commands. When you want to stop the server, click its window and press Ctrl+C.
python vs python3
If python isn't found, try python3 -m http.server 8000. On some systems only one
of them exists.
Now the loop, in your second terminal:
It shows index.html in red, under "Changes not staged for commit". Git noticed.
Refresh https://your-username.github.io after a minute. Your change is live.
That's the loop. Edit, save, look at localhost, add, commit, push. You'll do it
a few dozen times today and then it'll be automatic.
Commit messages
Write what changed, in a few words: "Add education section", "Fix broken LinkedIn
link". Not "update", not "asdf", not "changes". Future you will read these
while trying to work out when something broke.
6. Build the actual page¶
Now make it yours. Here's a full skeleton — replace everything in [square brackets] and
delete what doesn't apply:
<!DOCTYPE html>
<html lang="en">
<head>
<meta charset="utf-8">
<meta name="viewport" content="width=device-width, initial-scale=1">
<title>[Your Name]</title>
<link rel="stylesheet" href="style.css">
</head>
<body>
<header>
<h1>[Your Name]</h1>
<p class="tagline">[MSc student in molecular biology, moving into computational work.]</p>
</header>
<main>
<section>
<h2>About</h2>
<p>
[Two or three sentences. What you work on, what you're interested in, what you're
looking for. Write it as if explaining to a person, not to a form.]
</p>
</section>
<section>
<h2>Education</h2>
<ul>
<li><strong>[MSc Molecular Biology]</strong>, [University] — [2023–2025]</li>
<li><strong>[BSc Biology]</strong>, [University] — [2020–2023]</li>
</ul>
</section>
<section>
<h2>Projects</h2>
<ul>
<li>
<strong>[Project name]</strong> —
[One sentence on what it does and what you used.]
<a href="[link to the GitHub repository]">Code</a>
</li>
</ul>
</section>
<section>
<h2>Contact</h2>
<ul>
<li><a href="mailto:[you@example.com]">[you@example.com]</a></li>
<li><a href="https://github.com/[your-username]">GitHub</a></li>
<li><a href="https://www.linkedin.com/in/[your-profile]/">LinkedIn</a></li>
</ul>
</section>
</main>
</body>
</html>
The HTML you actually need¶
You've now met most of it:
<h1>,<h2>— headings. One<h1>per page, your name.<p>— a paragraph.<ul>and<li>— an unordered list and its items.<a href="...">text</a>— a link.hrefis where it goes, the text is what's shown.<strong>— important, rendered bold.<section>,<header>,<main>— invisible boxes that group things. They don't change how the page looks; they say what each part is, which helps screen readers and search engines, and gives you something to point CSS at.
Tags come in pairs: <p> opens, </p> closes. The commonest beginner bug is a missing
closing tag, and the symptom is that the rest of the page looks wrong rather than the bit
you were editing.
Make it look decent¶
Create a second file called style.css in the same folder. The <link> tag already in
your HTML pulls it in.
body {
  font-family: system-ui, -apple-system, "Segoe UI", sans-serif;
  line-height: 1.6;
  max-width: 42rem;
  margin: 3rem auto;
  padding: 0 1.25rem;
  color: #24292f;
}

h1 {
  margin-bottom: 0.25rem;
}

.tagline {
  color: #57606a;
  margin-top: 0;
}

a {
  color: #0969da;
}

section {
  margin-top: 2.5rem;
}
That's deliberately short. Four ideas do nearly all the work:
max-width— the single highest-value line here. Text running the full width of a monitor is genuinely hard to read; the eye loses its place on the return sweep. Around 40–45 characters-wide-ish (42rem) is comfortable.margin: 3rem auto— space above and below, andautoleft/right, which centres the block. This is the standard trick for centring a page.line-height: 1.6— space between lines. Browsers default to something tight.color— pure black on pure white is harsher than it needs to be.#24292fis a very dark grey and reads more comfortably.
Resist adding more for now. A plain page that's easy to read beats an elaborate one, and the failure mode of a first personal site is always over-decoration, never under.
Save both files, refresh localhost:8000, then commit:
Adding everything at once
Once you're comfortable, git add . stages every changed file in the current folder,
which saves typing. Run git status first so you know what . is about to include.
7. When things go wrong¶
This section is the one to come back to. Expand whichever matches.
My page shows 404
In rough order of likelihood:
- It's still building. The first deploy takes a couple of minutes. Check the Actions tab of your repository — orange dot means in progress.
- The repository name is wrong. It must be exactly
your-username.github.io, with your real username. Check the spelling against your profile page. - The repository is private. Settings → scroll to the bottom → change visibility to public.
- There's no
index.html. Or it's namedIndex.html, orindex.htm, or it's inside a subfolder instead of at the top level. It must beindex.htmlat the root. - Pages isn't enabled. Settings → Pages → Source: Deploy from a branch, branch
main, folder/ (root).
I pushed, but the site hasn't changed
- Give it a minute. Deployment isn't instant. The Actions tab tells you when it's done.
- Your browser cached the old version. Hard-refresh: Ctrl+Shift+R (Windows, Linux) or Cmd+Shift+R (macOS). Or open the page in a private window, which is the reliable test.
- The push didn't actually happen. Run
git status. If it says "Your branch is ahead of 'origin/main' by 1 commit", the commit exists locally but wasn't pushed — rungit push. - You didn't save the file. Check for a white dot on the VS Code tab.
fatal: not a git repository
You're running a git command in a folder that git doesn't track. Almost always: you're one level too high, or one level too low.
If there's no .git, cd into your project folder and try again. cd .. goes up one
level.
Updates were rejected because the remote contains work that you do not have locally
Someone — usually you, through the GitHub website — changed the repository since you last downloaded it. Your local copy is missing that change, and git won't overwrite it.
git pull fetches the changes and merges them into your copy. If it opens a text
editor asking for a merge message, that's normal: press Ctrl+X if it looks like
nano, or Esc then type :wq and Enter if it looks like vim.
To avoid this: pick one place to edit — your computer — and stop editing through the website.
git push asks for a username and password
Your account password won't work; GitHub disabled that in 2021. What's happening is that this repository is talking to GitHub over HTTPS instead of using your SSH key. Check which one it's using:
If the address starts with https://github.com/, point it at SSH instead:
Run git remote -v again to confirm it changed, then push. If it still asks, the key
itself is the problem — see the next box.
git@github.com: Permission denied (publickey)
GitHub isn't recognising your key. Test it on its own:
If that fails too, it's one of three things:
- There's no key on this computer.
ls ~/.ssh/should listid_ed25519andid_ed25519.pub. If it doesn't, generate one — step 5. - The key never reached GitHub. Open
github.com/settings/keys and compare what's
listed there against the output of
cat ~/.ssh/id_ed25519.pub. - You're on a different computer than the one you set up. Keys are per-machine, and that's deliberate. Generate a key here too and add it — one account can hold many, which is how you revoke a lost laptop without disturbing anything else.
It asks for my key passphrase every single time
That is what a passphrase does. To type it once per session instead of once per push, hand the key to the ssh-agent:
On macOS, ssh-add --apple-use-keychain ~/.ssh/id_ed25519 stores it in the keychain
and you won't be asked again on that machine.
nothing to commit, working tree clean — but I changed something
Three possibilities:
- You didn't save the file in your editor.
- You saved it somewhere else — a different copy of
index.htmlin another folder. Runpwdand check you're in the folder you think you are. - You already committed it. Run
git log --onelineto see your recent commits.
My CSS isn't doing anything
- File name mismatch. The
<link>tag sayshref="style.css", so the file must be called exactlystyle.css, in the same folder asindex.html.styles.csswon't work. - Cached. Hard-refresh (Ctrl+Shift+R / Cmd+Shift+R).
- A missing
}or;. CSS fails quietly: one syntax error can silently kill every rule after it. Check the block just above the first rule that stopped working.
The page looks broken after I edited the HTML
Look for an unclosed tag. Every <p> needs a </p>, every <section> a </section>.
In VS Code, click just after an opening tag — it highlights the matching closing tag. If nothing highlights, you've found your problem.
command not found: python
Try python3 -m http.server 8000. If neither exists, install Python from
python.org, or just open index.html by
double-clicking it for now — the local server is a convenience, not a requirement.
The terminal is stuck and won't take new commands
Something is still running — probably python -m http.server, which runs until you
stop it. Press Ctrl+C to stop it.
If you're in a text editor you didn't mean to open: Ctrl+X exits nano, and
Esc then :q! then Enter exits vim.
8. Going further¶
Optional, in increasing order of effort:
- A favicon. The little icon in the browser tab. Drop a
favicon.icoorfavicon.pngat the root and add<link rel="icon" href="favicon.png">to your<head>. - A photo.
<img src="me.jpg" alt="Photo of [your name]" width="160">. Always write thealttext — it's what screen readers announce and what shows if the image fails. - A PDF of your CV. Put
cv.pdfin the folder, link to it. Now you have a stable URL you can give people that always has the current version. - More pages.
projects.htmlnext toindex.htmlis reachable atyour-username.github.io/projects.html. Link between them. - A custom domain. Buy
yourname.comand put it in Settings → Pages → Custom domain. At the registrar you point fourArecords at GitHub's addresses and awwwCNAMEatyour-username.github.io; GitHub's own page lists the addresses and issues the HTTPS certificate for you. Around €10–15 a year, and it makes a noticeable difference to how a link reads. Nothing breaks when you do it: the old address redirects to the new one, and every project page follows, soyour-username.github.io/thesis-code/starts landing onyourname.com/thesis-code/. - A static site generator. When you have more than four or five pages, copying the same header into each one gets old. That's the moment to switch — and the moment it'll make sense, which is exactly why we didn't start there.
What you actually learned¶
Worth naming, because it's more than it felt like:
- Git:
status,add,commit,push,pull,clone— the loop that essentially all software work runs on. - The shell:
pwd,ls,cd, running a program, stopping it with Ctrl+C, and the idea of a working directory. - HTML and CSS: enough to build and change a page without copying a template.
- Deployment: you have a thing on the internet, and you know how it got there.
And a public URL with your name on it, which is the point.
Where to go next¶
Two tutorials carry on from here, and you can do them in either order.
The file too big for Excel takes the terminal you've just met and points it at 1.2 million rows of real human genetics data — a file a spreadsheet physically cannot open — and ends with a second repository on your account.
Redesign your website without fear comes back to this site. Branches, so you can try an idea without committing to it, and five ways to undo, so that "I've broken it" stops being a reason not to touch the page. If you already want to change something here and are nervous about it, go there first.
Where did you get stuck?
If any step here was confusing, wrong, or missing something — open an issue. The "when things go wrong" section above is built entirely out of those reports, and it's the most useful part of this page.